It becomes necessary at times to convert PDFs to Tagged Image File Format (TIFF) for further use mainly in printing as well as faxing. For this purpose TIFF is being commonly used in the form of image file. What makes TIFFs amazingly different from other file formats is that it lets first-copy of the data to be faultlessly recreated as the compressed data without making any difference to the original quality of image. However the procedure of conversion can be time-consuming if there are a lot of files which requires conversion. Is there any easy and fast way to convert PDF to TIFF? Now, I will offer you the greatest solution.
In order to help you avoid such kind of issues,PDFelement Pro came into existence along with its powerful tools which also includes an ability of conversion of the PDF files to Word, Excel, PowerPoint, Text Document, Electronic Publication, Hypertext Markup Language, Rich Text Forma, JPEG, BMP, PNG, GIF and TIFF.
PDFelement Pro for Mac makes this operation as much effortless and uncomplicated as it hasn't been ever before that too just by following few quick steps which are also mentioned below:
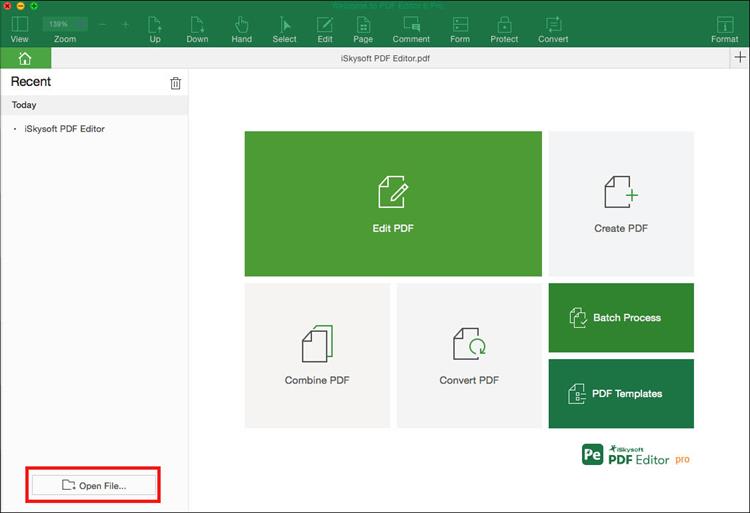
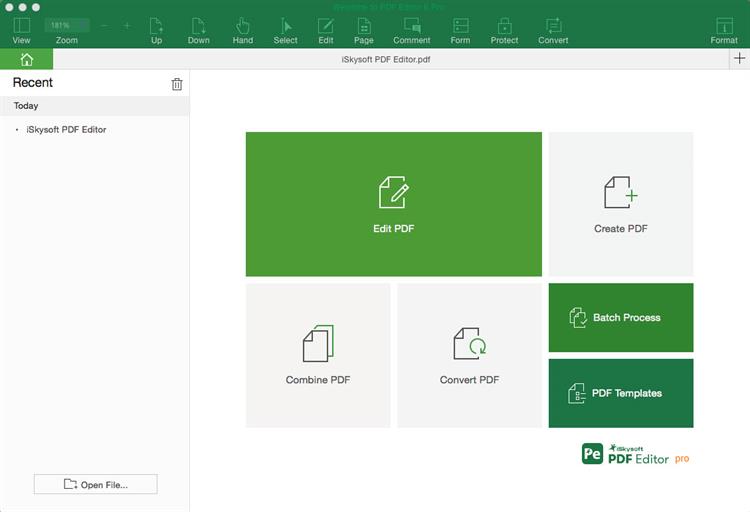
After installation, launch the software and then import the target PDF from your local folder to the program by clicking the "Open File" button. When the PDF file is opened in the program, you can take full advantages of the editing features to compile your PDF as you want.
To start conversion, you can go to the top Menu bar then click on second last button named as "Convert".
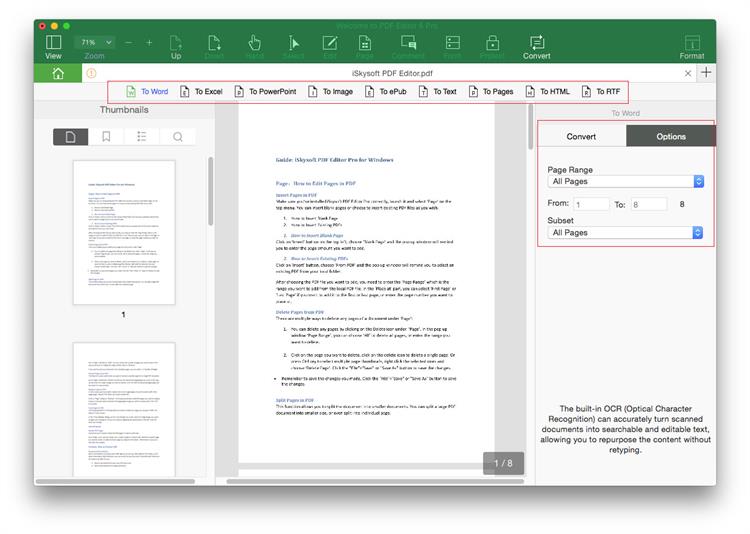
As a result, a dialog box will appear along with options to choose output format. In this case, you should choose "To Image > TIFF" as the output format. From here, you can also customize page range and destination folder. When everything is done, click "Convert" start the conversion process.
Further, PDFelement Pro includes extraordinary features such as editing of scanned file in PDF format, creating forms in PDF format, adding handwritten signatures, encryption, compression as well as conversion. It also provides you multiple PDF editing tools to edit PDF texts, links, image, and other elements with ease. PDFelement Pro will be the best PDF solution for you.
Why Choose This PDF Converter:
PDFelement Pro consists of everything which is definitely above the basic requirements of editing PDFs since it gives 100 % accessibility to its users to make their editing experience as much outstanding as they can. As it includes great features such as editing of scanned file in PDF format, creating forms in PDF format, adding handwritten signatures, encryption, compression as well as conversion.
iSkysoft PDF Editor is outstanding solution as it meets all the needs of PDF editing. Further it comes with powerful tools of conversion which also include a conversion of PDF to TIFF that too within no time and without invoke a print driver. It provides their users with almost all features related to editing PDFs easier then it could be done ever.
Install it on your Windows computer. Follow the simple steps to finish the install. Below is a step-by-step way to edit and convert PDF to PNG on Windows using PDFelement Pro for Windows.
Launch the program and then click the "Open" button to browse your local folder. Choose the PDF file you want to convert and then load it to the PDF Editor. This program offers you many editing features, letting you freely do the change on your document as you want.

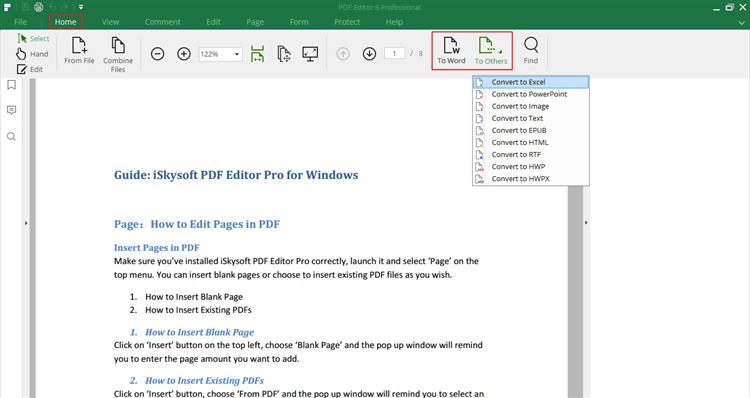
Click on the "Home" tab after that click on the "To Image" button will be needed. Thus, a dialog will be shown. Proceed to selection of file format by clicking on a pop-up menu beside "Add Files" tab after that you can select TIFF as a desired file format furthermore a click on a "Convert" tab. This will lead to conversion of PDF file to TIFF image format and TIFF will become automatically visible on screen.
Choose "PNG" and click "Convert" to start the process. Finally watch as iSkysoft PDF Editor go to work for you. Within minutes it will be done converting your PDF into PNG images that can be shared or edited accordingly.
One of the ways you can convert PDF to TIFF is to use an online tool. PDF2TIFFis one of the best and even allows you to covert multiple PDFs to TIFF. Here's how to convert PDF to TIFF using this online tool.
Step 1. Go to the official website of the online tool to access the online tool.
Step 2. In the main window, click on "Upload Files" to select the PDF you'd like to convert. You can also simply drag and drop the PDF into the area marked "Drop Your Files Here".
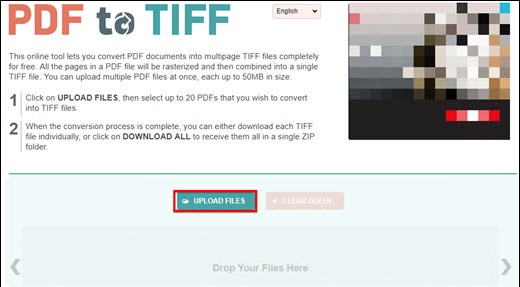
Step 3. Once the file is uploaded, the program will begin converting the PDF to TIFF immediately.

Step 4. When the process is complete, click on "Download" or "Download All" to get your TIFF file.

Photoshop is also one of the easiest ways to convert PDF to TIFF file. To use Photoshop to convert PDF to TIFF image, download the Adobe Photoshop program and create an account and then follow these simple steps.
Step 1. Open Adobe Photoshop and sign in to your account. Click "File" and then "Open" to select the PDF file you'd like to convert.
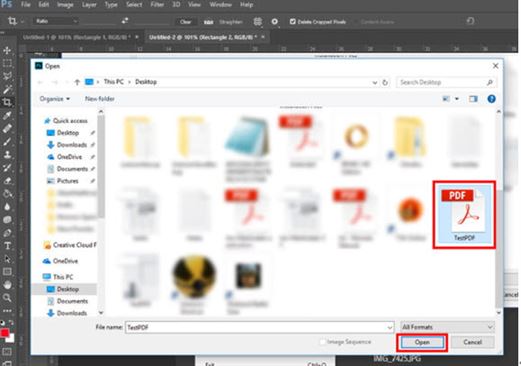
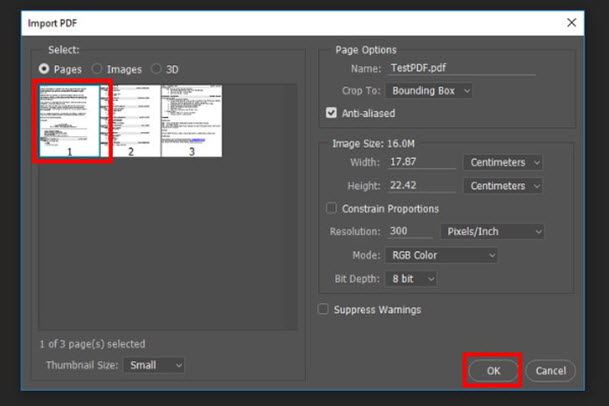
Step 2. A popup window will appear, allowing you to select the page you'd like to convert to TIFF. Click "OK" when you're happy with your selection to continue.
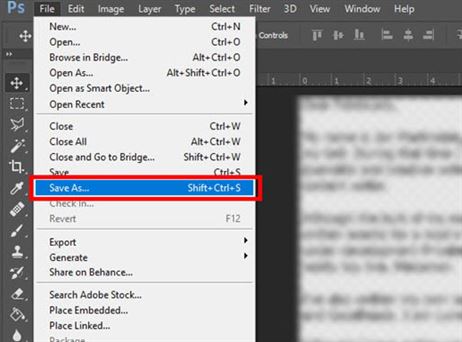
Step 3. With the page selected, click "File" and then "Save As." In the "Save as Type" drop down menu, select "TIFF" as the type and click "OK" to save the file.
Imagemagick is a command line tool that you can use to convert PDF file to TIFF quite easily. The following is how to convert a PDF into a TIFF in Imagemagick.
Step 1. You will first need to install Imagemagick on your computer. You can do that by going to the official website and following the instructions.
Step 2. To convert a PDF file to TIFF. Enter the following command:

"input_file_name.pdf" in this case refers to the PDF file you want to convert and "output_file_name.tiff" refers to the file name of the converted PDF document. If you'd like to convert specific pages of the PDF to TIFF, enter the following command:

Note: The [1] represents the number of the page you want converted.